AI in AD4M
Looking for AI agent integration? This page covers running AI models inside AD4M. If you want AI agents to use AD4M — creating perspectives, managing data, joining neighbourhoods — see the MCP Server guide.
AD4M provides powerful AI capabilities through both local and remote model inference. This allows you to integrate various AI models into your applications, from language models to embedding models and speech recognition.
Overview
The AI system in AD4M supports:
- Large Language Models (LLM) for text generation and chat
- Embedding Models for vector representations of text
- Speech-to-Text Models for audio transcription
- Both local and remote (API-based) model execution
- Model management and configuration
- Task-based inference with system prompts and examples
Model Configuration
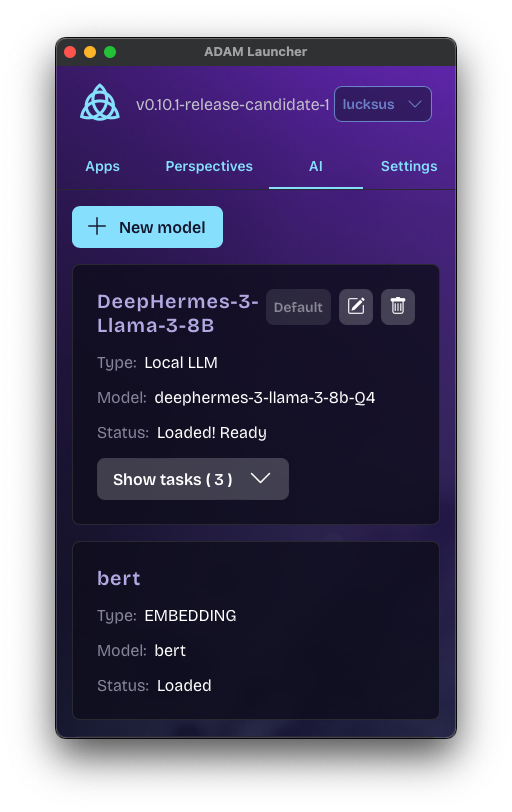
Before using AI features, models need to be configured in the AD4M Launcher. Models can be either local (running on your device) or remote (using external APIs).
Local Models
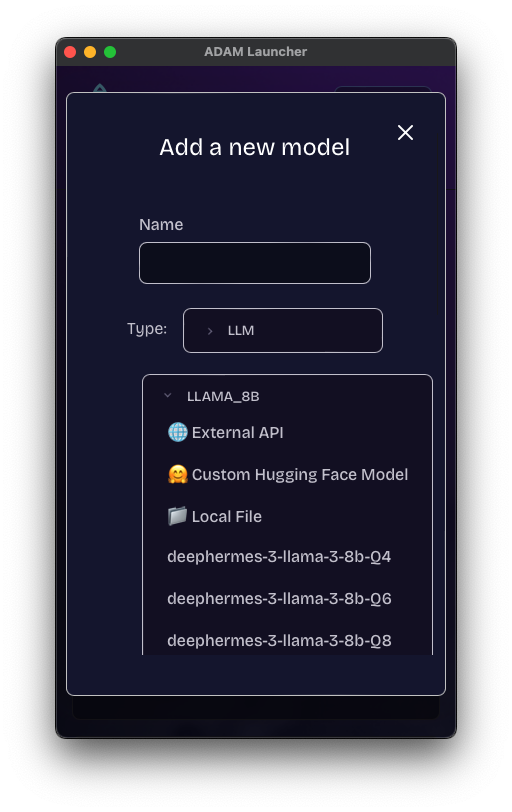
Local models run directly on your device using CPU or GPU acceleration (if available). There are three ways to configure local models:
1. Pre-configured Models
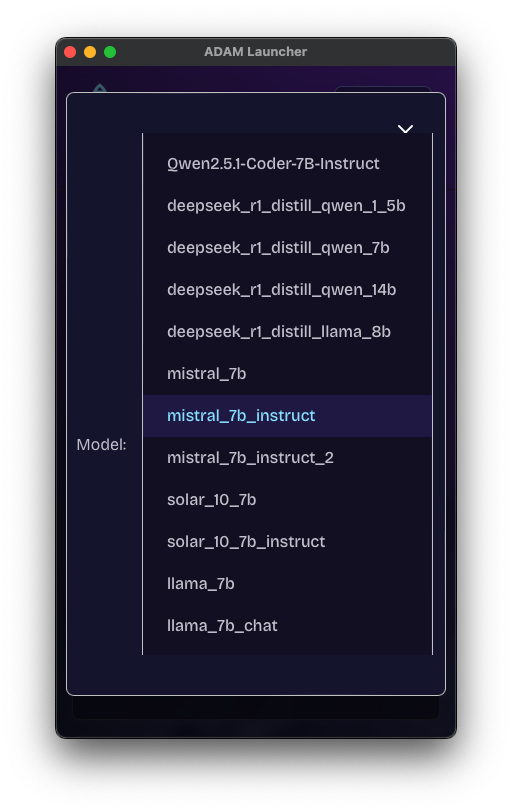
AD4M comes with several pre-configured models that can be used by simply specifying their name:
const preConfiguredModel = {
  name: "DeepHermes 3 (Q4)",
  local: {
    fileName: "deephermes-3-llama-3-8b-Q4"  // Just specify the model name
  },
  modelType: "LLM"
};
Available pre-configured models:
Language Models (LLM):
Qwen2.5.1-Coder-7B-Instruct- Optimized for coding tasksdeephermes-3-llama-3-8b-Q4- Fast, efficient 8B parameter model (Q4 quantization)deephermes-3-llama-3-8b-Q6- Better quality, slightly larger (Q6 quantization)deephermes-3-llama-3-8b-Q8- Best quality, largest size (Q8 quantization)deepseek_r1_distill_qwen_1_5b- Small, fast 1.5B parameter modeldeepseek_r1_distill_qwen_7b- Medium 7B parameter modeldeepseek_r1_distill_qwen_14b- Large 14B parameter model
Embedding Models:
bert- Built-in BERT model for text embeddings
Speech-to-Text Models:
Whisper- OpenAI's Whisper model for audio transcription
2. Models from Hugging Face
AD4M can automatically download and use models from Hugging Face. Just provide the repository details:
const huggingFaceModel = {
name: "Custom LLM",
local: {
fileName: "model.gguf", // The model file to use from the repo
huggingfaceRepo: "username/model-repo", // Hugging Face repository path
revision: "main", // Branch or tag to use
tokenizerSource: { // Optional custom tokenizer
repo: "username/tokenizer-repo",
revision: "main",
fileName: "tokenizer.json"
}
},
modelType: "LLM"
};
// Example with a specific model version
const versionedModel = {
name: "Specific Model Version",
local: {
fileName: "model-q4.gguf",
huggingfaceRepo: "TheBloke/Mistral-7B-Instruct-v0.1-GGUF",
revision: "main"
},
modelType: "LLM"
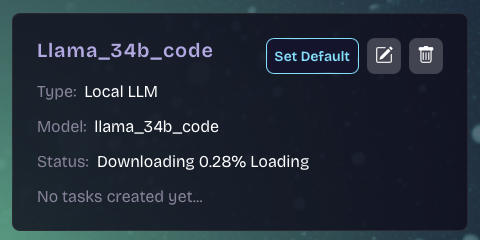
};When you add a model with a Hugging Face repository, AD4M will:
- Download the model files from Hugging Face
- Store them locally
- Load the model when needed
3. Local Files
You can also use model files that are already on your device:
const localFileModel = {
name: "My Local Model",
local: {
fileName: "/absolute/path/to/model.gguf", // Full path to model file
tokenizerSource: {
repo: "", // Empty repo means local file
fileName: "/path/to/tokenizer.json"
}
},
modelType: "LLM"
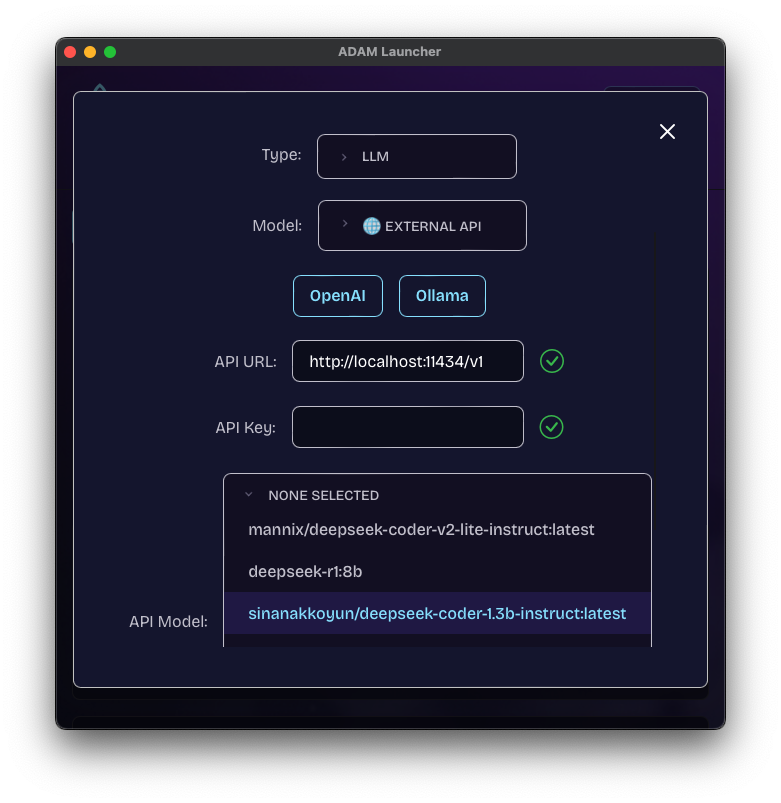
};Remote Models (API)
Remote models use external APIs for inference. AD4M currently supports OpenAI-compatible APIs:
// OpenAI API
const openAiModel = {
  name: "GPT-4",
  api: {
    baseUrl: "https://api.openai.com/v1",
    apiKey: "your-api-key",
    model: "gpt-4",
    apiType: "OPEN_AI"
  },
  modelType: "LLM"
};

// Custom OpenAI-compatible API
const customApiModel = {
  name: "Local API Server",
  api: {
    baseUrl: "http://localhost:8000",
    apiKey: "local-key",
    model: "local-model",
    apiType: "OPEN_AI"
  },
  modelType: "LLM"
};
Hardware Acceleration
AD4M automatically detects and uses available hardware acceleration:
- CUDA: For NVIDIA GPUs (requires
cudafeature) - Metal: For Apple Silicon and AMD GPUs on macOS (requires
metalfeature) - CPU: Falls back to CPU if no GPU acceleration is available
Using AI in Your Application
1. Adding Models
import { Ad4mClient } from '@coasys/ad4m';

const client = new Ad4mClient();

// Add a model
const modelId = await client.ai.addModel(modelConfig);

// Wait for model to load
let status;
do {
  status = await client.ai.modelLoadingStatus(modelId);
  await new Promise(resolve => setTimeout(resolve, 1000));
} while (status.progress < 100);
2. Creating AI Tasks
Tasks allow you to define specific use cases with system prompts and examples:
const task = await client.ai.addTask(
  "code-helper",
  modelId,
  "You are a helpful coding assistant. Provide clear and concise code examples.",
  [
    {
      input: "How do I read a file in Node.js?",
      output: "Here's a simple example using fs.readFile:\n\n```javascript\nconst fs = require('fs');\n\nfs.readFile('file.txt', 'utf8', (err, data) => {\n  if (err) throw err;\n  console.log(data);\n});\n```"
    }
  ]
);
3. Using Models
Text Generation (LLM)
// Using a task
const response = await client.ai.prompt(
  task.taskId,
  "How do I create a web server in Node.js?"
);

// The response will follow the system prompt and examples pattern
console.log(response);
Text Embeddings
// Get vector representation of text
const vector = await client.ai.embed(
  "bert",  // Built-in BERT model
  "Convert this text to a vector"
);
Speech-to-Text
// Open a transcription stream
const streamId = await client.ai.openTranscriptionStream(
  "Whisper",
  (text) => {
    console.log("Transcribed:", text);
  },
  {
    // Optional voice activity detection parameters
    startThreshold: 0.3,
    startWindow: 150,
    endThreshold: 0.2,
    endWindow: 300,
    timeBeforeSpeech: 100
  }
);

// Feed audio data (Float32Array samples at 16kHz)
await client.ai.feedTranscriptionStream(streamId, audioSamples);

// Close stream when done
await client.ai.closeTranscriptionStream(streamId);

// Or use multiple streams simultaneously
const fastStreamId = await client.ai.openTranscriptionStream(
  "whisper_tiny",
  (text) => console.log("Fast preview:", text),
  {
    startThreshold: 0.25,
    startWindow: 100,
    endThreshold: 0.15,
    endWindow: 100
  }
);

const accurateStreamId = await client.ai.openTranscriptionStream(
  "whisper_small",
  (text) => console.log("Accurate:", text),
  {
    startThreshold: 0.3,
    startWindow: 150,
    endThreshold: 0.2,
    endWindow: 500
  }
);

// Feed same audio to both streams with a single call
await client.ai.feedTranscriptionStream([fastStreamId, accurateStreamId], audioSamples);
Note: Transcription streams are automatically cleaned up after 30 seconds of inactivity.
Best Practices
-
Model Selection
- Use quantized models (Q4/Q6) for faster inference on CPU
- Use larger models when quality is critical
- Consider API models for production use cases
-
Task Design
- Write clear system prompts
- Provide specific examples
- Use task-specific models when possible
-
Resource Management
- Close transcription streams when done
- Monitor model loading status
- Handle errors appropriately
-
Performance
- Use GPU acceleration when available
- Batch similar requests together
- Consider model size vs performance tradeoffs
Error Handling
try {
  const response = await client.ai.prompt(taskId, prompt);
} catch (error) {
  if (error.message.includes("Model not found")) {
    // Handle missing model
  } else if (error.message.includes("Task not found")) {
    // Handle missing task
  } else {
    // Handle other errors
  }
}
Advanced Features
Default Models
You can set default models for each type:
await client.ai.setDefaultModel("LLM", modelId);

// Use default model in tasks
const task = await client.ai.addTask(
  "default-task",
  "default",  // Uses the default LLM
  "System prompt...",
  []
);
Model Updates
Models can be updated while maintaining tasks:
const updated = await client.ai.updateModel(modelId, newConfig);Real-time Transcription
Configure voice activity detection for word-by-word transcription:
const streamId = await client.ai.openTranscriptionStream(
  "Whisper",
  (text) => console.log("Word:", text),
  {
    startThreshold: 0.25,
    startWindow: 100,
    endThreshold: 0.15,
    endWindow: 100,
    timeBeforeSpeech: 20
  }
);
Multiple Transcription Streams
You can process the same audio through multiple models simultaneously:
// Use a fast model for real-time preview
const fastStreamId = await client.ai.openTranscriptionStream(
  "whisper_tiny",
  (text) => console.log("Preview:", text),
  { startThreshold: 0.25, endWindow: 100 }
);

// Use a more accurate model for final results
const accurateStreamId = await client.ai.openTranscriptionStream(
  "whisper_small",
  (text) => console.log("Final:", text),
  { startThreshold: 0.3, endWindow: 500 }
);

// Feed audio to both streams efficiently
await client.ai.feedTranscriptionStream([fastStreamId, accurateStreamId], audioSamples);
Automatic Stream Cleanup
Transcription streams are automatically cleaned up after 30 seconds of inactivity to prevent resource leaks. This means:
- No need to manually close streams if the client disconnects
- Resources are freed automatically when streams are abandoned
- Streams remain active as long as they receive audio data regularly